The Stoke Pizza Oven is an excellent choice for outdoor cooking, offering portability, high-temperature performance, and versatility with wood or gas fuel options․ Designed for quick cooking, it achieves crispy crusts and perfectly cooked toppings in minutes․ Its heat-resistant steel shell and smokeless operation make it ideal for backyard gatherings․ Included accessories like a pizza peel and weather-proof cover enhance convenience, ensuring a seamless cooking experience․
1․1 Overview of the Stoke Pizza Oven
The Stoke Pizza Oven is a portable, high-performance cooking solution designed for outdoor enthusiasts․ It features a heat-resistant steel shell, allowing it to reach 900°F for quick baking․ Available in 13-inch and 16-inch models, it offers wood, gas, or hybrid fuel options․ Lightweight and easy to transport, it comes with a pizza peel and travel cover, making it perfect for backyard gatherings and picnics․
1․2 Benefits of Using the Stoke Pizza Oven
The Stoke Pizza Oven offers high-performance cooking, achieving restaurant-grade results at home․ Its portability, versatility, and quick preheating make it ideal for outdoor gatherings․ With options for wood, gas, or hybrid fuel, it provides flexibility in cooking styles․ Accessories like a pizza peel and travel cover add convenience, while its durable design ensures long-lasting performance and easy maintenance․

Unpacking and Initial Setup
Unpack the Stoke Pizza Oven carefully, using a box cutter to unwrap components․ Place the oven on a flat surface, ensuring stability and proper alignment for safe operation․
2․1 Unpacking the Oven and Components
Use a box cutter to carefully unwrap each component of the Stoke Pizza Oven․ For the 16-inch model, turn the oven on its side to remove the internal flame shield and wood basket․ Separate all components, ensuring they are ready for assembly․ This step ensures a smooth setup process and prevents damage to the oven or its parts․
2․2 Placing the Oven on a Flat Surface
Position the Stoke Pizza Oven on a stable, flat surface to ensure even heating and safety․ After unpacking, unfold the legs and upright the oven․ For models with foldable legs, secure them firmly․ Ensure the surface is heat-resistant and clear of flammable materials, following safety guidelines for optimal performance and risk reduction during operation․
Assembling the Stoke Pizza Oven
Begin by unboxing and unwrapping all components․ Use a box cutter and Phillips screwdriver for assembly․ For 16-inch models, remove the internal flame shield to access the wood basket․ Attach handles and unfold legs to set the oven upright, ensuring stability before use․
3․1 Assembly Steps for Wood-Fired Models
Begin by unboxing and unwrapping all components․ Use a box cutter to remove packaging and a Phillips screwdriver for assembly․ For wood-fired models, remove the internal flame shield to access the wood basket․ Attach the wooden handles to the door, hopper, and basket․ Ensure all components are securely fastened before use․
3․2 Assembly Steps for Hybrid Models
For hybrid models, attach the gas burner kit by removing the internal flame shield and securing the frame with screws․ Ensure the gas burner is properly connected to the oven’s system․ Follow the manufacturer’s instructions to avoid leaks or malfunctions․ Once assembled, test the gas connection before preheating the oven for safe use․
3․3 Attaching the Chimney and Handles
Attach the chimney by aligning it with the designated slot and securing it firmly․ For handles, unscrew the door, hopper, and basket handles, place them in position, and tighten the screws․ Ensure all parts are securely fastened for safe and efficient operation․ Follow the manufacturer’s guide for precise alignment and tightening․
Preheating the Oven
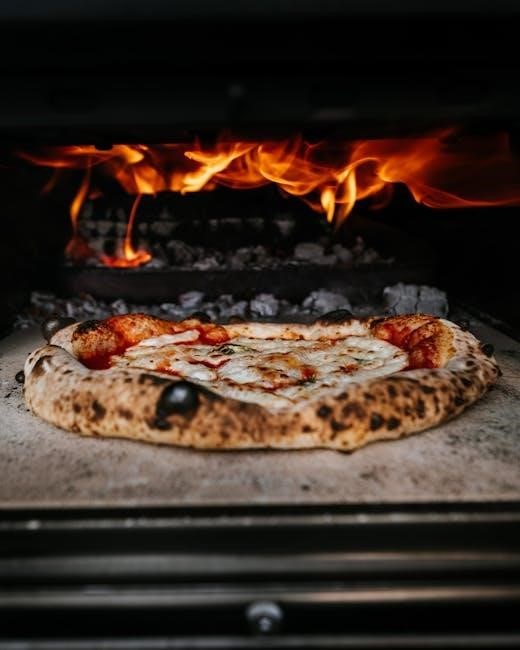
Preheating the Stoke Pizza Oven ensures optimal performance․ Arrange wood and kindling inside, light the fire, and let it heat up for 15-20 minutes until reaching 900°F․ Ensure airflow for even heating and monitor temperature with the thermometer for perfect preheating․
4․1 Preheating Steps for Optimal Performance
Start by lighting the fire with kindling and small logs, ensuring proper airflow․ Once the fire is burning steadily, add larger logs to reach the desired temperature․ Use the thermometer to monitor heat levels, aiming for 900°F․ Allow 15-20 minutes for preheating, ensuring the stone inside is evenly heated for the best results․ This process guarantees a perfectly cooked crust and evenly cooked toppings every time, making your pizza-making process efficient and enjoyable․
4․2 Achieving the Right Temperature
Monitor the thermometer to ensure the oven reaches 900°F for optimal performance․ Adjust the airflow and fuel supply to maintain consistent heat․ For wood-fired models, larger logs help sustain high temperatures, while gas models offer precise control․ Proper temperature management is key to achieving a crispy crust and evenly cooked toppings every time․
4․3 Timing Guidelines for Preheating
Preheat the Stoke Pizza Oven for 15-20 minutes for wood-fired models and 10-15 minutes for gas or hybrid models․ Start with kindling to build a strong flame, then add larger logs for sustained heat․ Ensure proper airflow for a smokeless fire․ The oven is ready when it reaches 900°F, indicated by the thermometer․
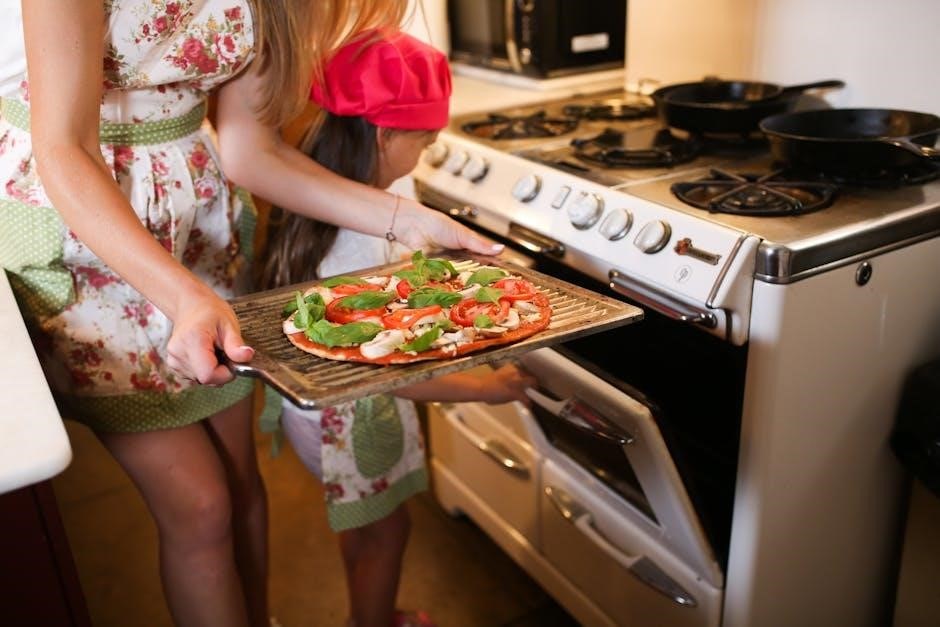
Cooking Your First Pizza
Cooking your first pizza in the Stoke Pizza Oven is an exciting experience․ Ensure the oven is preheated, place the pizza on the stone, and monitor closely for perfect results․
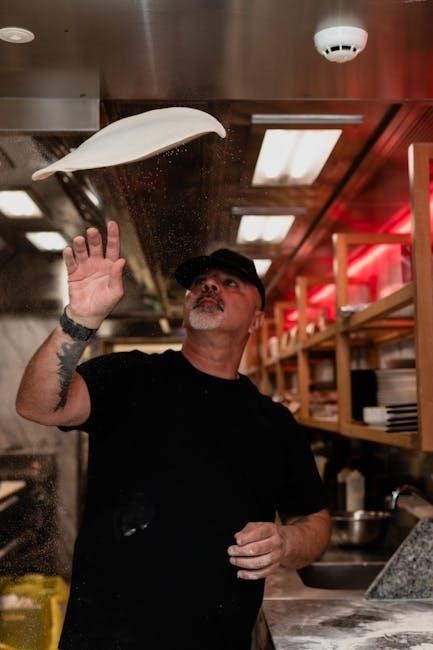
5․1 Preparing the Pizza Dough and Toppings
Prepare the pizza dough by flouring your surface and rolling it thinly․ Keep toppings simple and balanced to ensure even cooking․ Preheat the oven fully before placing the pizza inside for the best results․ Proper preparation ensures a crispy crust and well-cooked toppings every time․
5;2 Placing the Pizza in the Oven
Gently slide the pizza onto the preheated stone using a floured pizza peel to prevent sticking․ Ensure the pizza is centered and evenly placed for optimal heat distribution․ Avoid overloading with toppings to maintain even cooking and a crispy crust․ Proper placement ensures a perfectly cooked pizza every time․
5․3 Cooking Time and Monitoring
Cooking time varies between 2-5 minutes, depending on temperature and pizza size․ Monitor the pizza closely, rotating it every 20-30 seconds for even cooking․ Use a pizza peel to check the crust color and toppings․ Ensure the crust is golden and bubbly before removing․ Adjust cooking time based on fuel type and oven temperature for perfect results․

Tips for Achieving the Perfect Pizza
Preheat the oven to 900°F for optimal results․ Roll dough thinly and top sparingly to avoid sogginess․ Balance toppings for even cooking, and monitor heat to achieve a crispy crust and well-cooked toppings efficiently․
6․1 Pizza Dough Preparation Tips
For perfect pizza dough, use high-protein flour and let it rest after kneading․ Roll dough thinly on a floured surface to ensure even cooking․ Preheat the Stoke Oven to 900°F, place dough on a peel, and top sparingly to avoid sogginess․ This method ensures a crispy crust and well-cooked toppings in minutes․
6․2 Choosing the Right Toppings
Less is more when it comes to toppings for the Stoke Pizza Oven․ Select fresh, high-quality ingredients that complement the oven’s high heat․ Opt for toppings that cook quickly, like fresh vegetables or cured meats․ Avoid overload to ensure a crispy crust․ Balance flavors and textures for a perfect pizza every time․
6․3 Managing Heat for Perfect Crust
Preheat the Stoke Pizza Oven to 900°F for optimal crust cooking․ Use the pizza stone to ensure even heat distribution․ Monitor the temperature and adjust airflow to maintain consistent heat․ Achieve a crispy crust by cooking for 2-3 minutes, rotating as needed for even cooking․ Proper heat management ensures a perfectly cooked crust every time․
Troubleshooting Common Issues
Address flame control, temperature fluctuations, and crust issues by adjusting airflow, monitoring heat, and ensuring proper oven setup․ Regular maintenance can prevent many common problems․
7․1 Addressing Flame Control Problems
Flame control issues can be resolved by adjusting airflow and wood placement․ Ensure proper ventilation and use smaller logs to maintain steady flames․ Check for obstructions and clean the chimney regularly to prevent smoke buildup․ Adjusting the damper can also help regulate flame size and intensity for consistent cooking performance․
7․2 Solving Temperature Fluctuation Issues
Temperature fluctuations can be managed by monitoring the oven’s thermometer and adjusting the damper․ Ensure proper airflow by keeping the door slightly ajar and checking for blockages in the chimney․ Preheating the oven thoroughly before cooking helps stabilize temperatures․ Regularly cleaning the oven and maintaining optimal wood quality also supports consistent heat performance․
7․3 Dealing with Undercooked or Burnt Crust
Undercooked or burnt crusts can result from uneven heat or incorrect cooking times․ To fix this, ensure proper airflow by adjusting the damper and monitor the oven’s temperature․ Rotate the pizza midway through cooking for even heating; Using a pizza peel to quickly place and retrieve the pizza helps prevent burning․ Preheating the oven thoroughly is also crucial for consistent results․

Safety Precautions
Always keep children away from the oven while in use․ Use heat-resistant gloves and ensure the surrounding area is clear of flammable materials․ Place the oven on a non-flammable surface and keep a fire extinguisher nearby․ Avoid operating the oven in strong winds or during extreme weather conditions․ Regularly inspect all components for damage to prevent potential hazards․
8․1 Safe Placement and Installation
Place the Stoke Pizza Oven on a heat-resistant, flat surface, away from flammable materials and overhanging structures․ Ensure the area is level and stable to prevent tipping․ Keep a fire extinguisher nearby and maintain a safe distance from children and pets during operation․ Proper installation ensures safe and efficient cooking experiences․
8․2 Protecting from Weather and Elements
Protect your Stoke Pizza Oven from weather by using a weather-resistant cover when not in use․ Store it in a dry, sheltered area to prevent moisture damage․ Regularly clean and inspect the oven to ensure durability․ Avoid exposure to direct rainfall or standing water, as this can compromise the oven’s performance and longevity․
8․3 Emergency Procedures
In case of an emergency, turn off the gas supply immediately and smother flames with a fire extinguisher․ Keep a fire extinguisher nearby and ensure proper ventilation․ Never use water to extinguish grease or gas fires․ If the situation is uncontrollable, evacuate the area and contact emergency services promptly․
Accessories and Upgrades
Enhance your Stoke Pizza Oven experience with essential accessories like a gas burner kit for added versatility, a weather-resistant cover for protection, and a pizza peel for effortless cooking․
9․1 Essential Accessories for Your Oven
Elevate your cooking experience with the Stoke Pizza Oven’s essential accessories․ A weather-resistant cover protects your oven from the elements, while a pizza peel ensures easy dough sliding․ The included thermometer helps monitor internal temperatures, and the carrying case offers convenient portability․ These accessories enhance functionality, durability, and overall performance, making every pizza session a success․
9․2 Upgrading with a Gas Burner Kit
Enhance your Stoke Pizza Oven’s versatility by adding a gas burner kit, allowing you to use propane for consistent heat control․ This optional upgrade provides convenience, especially for quick preheating and even cooking without wood․ Installation is straightforward, and it complements the oven’s existing features, expanding your cooking options for perfect pizza results every time․
9․4 Using a Pizza Peel Effectively
A pizza peel is essential for transferring pizzas to and from the Stoke Pizza Oven․ Lightly flour the surface to prevent sticking, then gently slide the pizza onto the peel․ Use a smooth motion to place the pizza inside the oven and rotate it midway for even cooking․ This tool ensures safe and efficient pizza handling․

Maintenance and Care
Regular cleaning, proper storage, and inspections ensure the Stoke Pizza Oven lasts․ Remove ash, wipe surfaces, and check for damage to maintain optimal performance and safety․
10․1 Cleaning the Oven Regularly
Regular cleaning is essential for maintaining the Stoke Pizza Oven’s performance․ Use a wire brush to remove ash and food residue from the interior․ Wipe surfaces with a damp cloth, paying attention to the chimney and handles․ Avoid harsh chemicals to preserve the oven’s finish․ Cleaning ensures optimal heat distribution and prevents damage from buildup․
10․2 Storing the Oven Properly
Store the Stoke Pizza Oven in a dry, shaded area to protect it from weather․ Use the included weather-proof cover to prevent rust and damage․ Fold the legs for compact storage․ Avoid direct sunlight and moisture․ Clean the oven thoroughly before storage to prevent food residue buildup and maintain its appearance․
10․3 Regular Maintenance Checks
Regularly inspect the Stoke Pizza Oven for wear and tear․ Clean the chimney and flue to ensure proper airflow․ Check for rust and apply a rust-resistant coating if needed․ Inspect the gasket for tight seals to maintain heat efficiency․ Perform these checks every 3 months to ensure optimal performance and longevity of your oven․