
The True Metrix Meter is a self-monitoring blood glucose system designed for accurate and easy glucose testing. It provides essential data for effective diabetes management, ensuring optimal health outcomes.
1.1 Overview of the True Metrix Meter
The True Metrix Meter is an in vitro diagnostic system designed for self-monitoring blood glucose levels. It provides accurate and reliable readings, essential for effective diabetes management. The system includes a meter, test strips, and control solutions, ensuring precise glucose measurement. Designed for ease of use, the meter is portable and user-friendly, making it ideal for daily monitoring. Intended for personal use, it allows individuals to track their blood glucose levels and adjust their treatment plans accordingly. Proper storage and handling are crucial to maintain accuracy, with recommendations to keep the system in a dry place at room temperature. This system is a vital tool for managing diabetes effectively.
1.2 Importance of Proper Usage
Proper usage of the True Metrix Meter is crucial for accurate blood glucose readings and safe diabetes management. Using the system as specified in the owner’s booklet ensures reliable results, helping users make informed decisions about their health. Incorrect usage, such as immersing the meter in liquids or using expired test strips, can lead to inaccurate readings and potential health risks. Adhering to guidelines ensures optimal performance and safety. Always store the meter and test strips in a dry place at room temperature to maintain accuracy. Proper usage also prevents errors and extends the lifespan of the device.

Components of the True Metrix Meter
The True Metrix Meter includes a compact meter device, test strips for blood sampling, control solutions for accuracy checks, and accessories like lancets and a lancing device;
2.1 The Meter Device
The True Metrix Meter device is a compact, portable glucose monitoring system designed for easy handling. It features a large, backlit LCD display for clear reading, even in low-light conditions. The meter includes a USB port for data transfer and a test strip port for simple operation. It operates on a single battery, providing long-lasting use. The device stores up to 500 test results, allowing users to track their glucose levels over time. Its ergonomic design ensures comfort and ease of use, making it ideal for both personal and professional settings. The meter is lightweight and durable, built for daily use.

2.2 Test Strips
The True Metrix Meter uses specific test strips designed for accurate blood glucose measurement. These strips are coated with a unique chemical formula to ensure precise results. Each strip is for single use and must be handled carefully to avoid contamination. Proper storage in the original vial, away from direct sunlight and moisture, is essential to maintain their effectiveness. Users should only insert strips into the meter when ready to test, as exposure to air can affect accuracy. Always check the expiration date on the vial before use and dispose of used strips safely. Adhere to the manufacturer’s guidelines for optimal performance.
2.3 Control Solutions
Control solutions are essential for verifying the accuracy of the True Metrix Meter and test strips. They are pre-calibrated with known glucose levels to ensure the meter is functioning correctly. Users should test the meter with control solutions upon opening a new batch of strips, before initial use, or if questionable results occur. Apply a small drop of control solution to the test strip, insert it into the meter, and compare the result with the expected range provided on the vial label. Proper use of control solutions helps maintain the reliability of blood glucose measurements and ensures user safety.
2.4 Accessories
The True Metrix Meter comes with several accessories to enhance usability and convenience. These include a carrying case for easy transport, a lancing device for obtaining blood samples, and lancets for pain-free testing. Additionally, a docking station or USB cable may be provided for data transfer to a computer or mobile app. These accessories ensure that users can manage their glucose monitoring effectively and maintain proper hygiene. The carrying case helps organize supplies, while the lancing device and lancets support accurate and comfortable blood sampling. Together, these accessories complement the meter’s functionality, ensuring a seamless testing experience for users.

Setting Up the True Metrix Meter
Setting up the True Metrix Meter involves inserting the battery, setting the date and time, and configuring units of measure. This ensures accurate and personalized use.
3.1 Inserting the Battery
To power the True Metrix Meter, insert a new CR2032 lithium battery. Ensure the meter is turned off before starting. Locate the battery compartment on the back and slide it open. Remove the old battery if present. Insert the new battery with the “+” sign facing up. Close the compartment securely. The meter will automatically turn on, displaying a start-up screen. Ensure the battery is properly seated to avoid errors. Use high-quality batteries for optimal performance. If the meter does not turn on, check the battery orientation and compartment closure. Replace the battery if necessary.
3.2 Setting the Date and Time
To set the date and time on your True Metrix Meter, press and hold the “Menu” button until the settings menu appears. Use the directional buttons to scroll to the “Date and Time” option and press “OK” to select it. Use the arrows to adjust the day, month, and year, then press “OK” to save. Next, set the time using the same method, ensuring to select either AM or PM if applicable. Finally, press “OK” to confirm and exit the menu. Accurate date and time settings ensure precise recording of blood glucose readings for better health tracking.
3.3 Configuring Units of Measure
To configure the units of measure on your True Metrix Meter, access the “Settings” menu by pressing and holding the “Menu” button. Use the directional arrows to navigate to “Units of Measure” and press “OK.” Choose between mg/dL (milligrams per deciliter) or mmol/L (millimoles per liter) based on your preference or regional standards. Once selected, press “OK” to save the setting. The meter will now display all readings in the selected unit of measure. Ensure this setting matches your healthcare provider’s recommendations for accurate interpretation of blood glucose results.
3.4 Setting Up for Multiple Users
The True Metrix Meter supports multiple user profiles, making it ideal for shared use in households or clinical settings. To set up for multiple users, go to the “Settings” menu and select “User Profile.” Choose “Create New User” and enter a unique identifier, such as a name or ID number. Repeat this process for each user. The meter will store individual test results separately, ensuring accurate tracking for each person. This feature enhances privacy and simplifies data management for users sharing the device. Always ensure each user’s profile is correctly selected before testing to maintain accurate records.
3.5 Professional Setup in a Clinical Environment
In a clinical setting, the True Metrix Meter can be configured to meet institutional requirements. Ensure the meter is set up with multiple user profiles, each linked to patient records for accurate tracking. Enable data encryption and secure access using passwords to protect patient information. Clinicians can connect the meter to electronic medical records (EMRs) for seamless data transfer. Regularly update software to maintain compliance with regulatory standards. Train staff to use the meter correctly, emphasizing proper test strip handling and control solution testing. This ensures reliable results and adherence to healthcare protocols, supporting efficient patient care and record-keeping.
Testing Procedures
Follow step-by-step guidelines for accurate blood glucose testing, including preparation, sample collection, and result interpretation. Always use authorized test strips and control solutions.
4.1 Preparing for a Blood Glucose Test
Wash your hands with soap and water to ensure cleanliness. Select a clean, dry finger and use a lancet to obtain a small blood sample. Avoid using alcohol wipes, as they may interfere with results. Sit comfortably and warm your hand to improve blood flow. Ensure the meter is turned on and ready for testing. Insert a test strip into the meter, following the device’s instructions. Confirm the strip is approved for your True Metrix Meter and not expired. Keep control solutions nearby to verify accuracy. Maintain a stable environment to prevent temperature-related errors. Proper preparation ensures reliable and accurate glucose readings;
4.2 Performing the Blood Glucose Test
Once prepared, gently prick the side of your fingertip with a lancet to collect a small blood sample. Avoid the sensitive tip to minimize discomfort. Hold the finger downward to allow blood to flow naturally. Lightly touch the blood droplet to the test strip’s absorbent tip until it is fully saturated. The meter will automatically detect the sample and begin processing. Wait for the result to appear on the screen. Use the navigation buttons if needed to access additional features or view previous readings. Ensure the test strip is properly ejected after use for hygienic disposal. Follow all safety guidelines to maintain accuracy and prevent errors.
4.3 Handling and Disposing of Test Strips
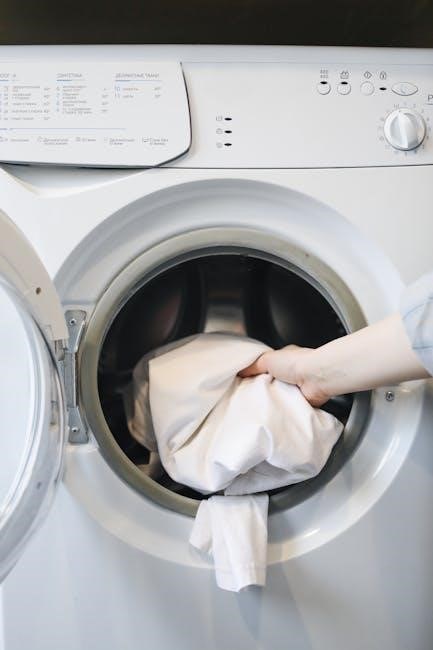
Always handle test strips with clean, dry hands to avoid contamination. Use each strip only once and discard immediately after testing. Expired or damaged strips should not be used, as they may provide inaccurate results. Store unused strips in their original container, away from direct sunlight and moisture. Dispose of used strips in a sealed container or sharps bin to prevent injury and environmental contamination. Never recycle test strips or dispose of them loosely in trash. Follow local regulations for biohazardous waste disposal to ensure safety and compliance with environmental standards. Proper handling and disposal are crucial for maintaining hygiene and accuracy.
4.4 Using Control Solutions for Accuracy
Control solutions are essential for ensuring the accuracy of your True Metrix Meter. They verify that the meter and test strips are functioning correctly. To use control solutions, first, check the expiration date on the solution bottle. Apply one or two drops of the solution to a test strip, then insert it into the meter. The meter will display a result, which should fall within the expected range indicated on the control solution packaging. If the result is outside this range, retest with a new strip or contact customer support. Always store control solutions at room temperature and avoid freezing. Proper use ensures reliable test results.

Understanding Your Results
The True Metrix Meter simplifies result interpretation with clear readings. It displays target ranges to help manage blood glucose levels effectively. Alarms and alerts notify you of abnormal levels.
5.1 Interpreting Blood Glucose Readings
The True Metrix Meter displays blood glucose readings in mg/dL or mmol/L, depending on your configured units. After testing, compare your result to your target range, set by your healthcare provider. If your reading is within range, continue with your diabetes management plan. Elevated readings may indicate hyperglycemia, requiring adjustments in diet, medication, or activity. Low readings suggest hypoglycemia, necessitating immediate treatment with fast-acting carbohydrates. The meter may alert you with alarms for extremely high or low readings, ensuring timely intervention to maintain health and safety.
5.2 Setting and Adjusting Target Ranges
Target ranges for blood glucose levels are typically set by your healthcare provider and may vary based on factors like age, health status, and treatment goals. The True Metrix Meter allows you to customize these ranges for personalization. Navigate to the “Settings” menu, select “Target Ranges,” and enter the desired values using the meter’s navigation buttons. Always consult your healthcare provider before adjusting these ranges to ensure they align with your diabetes management plan. Properly set ranges help you better understand when your glucose levels are within or outside the desired zone, promoting safer and more effective glucose control.
5.3 Understanding Alarms and Alerts
The True Metrix Meter features alarms and alerts to notify you of specific conditions. These include high or low blood glucose levels, system notifications, or test errors. Visual and auditory alerts ensure you never miss critical information. Alarms are triggered when your glucose reading falls outside the set target range or when the meter detects an issue, such as an expired test strip or improper measurement. Customize alarm settings in the “Settings” menu to suit your needs. Understanding these alerts helps you take timely action, ensuring better glucose management and overall health safety.

Maintenance and Care
Regular cleaning, proper storage, and timely battery replacement are essential for optimal performance. Avoid exposure to contaminants or extreme conditions to ensure accurate readings and longevity.
6.1 Cleaning the Meter
Clean the True Metrix Meter regularly to maintain accuracy and hygiene. Use a soft, dry cloth to wipe the exterior. For tougher spots, dampen the cloth with mild soap and water, but avoid liquids entering openings. Never use harsh chemicals, abrasive materials, or submerge the meter in water. Allow the meter to dry completely before use. Cleaning ensures proper functionality and prevents contamination. Regular maintenance prolongs the device’s lifespan and ensures reliable blood glucose readings. Always follow the manufacturer’s cleaning guidelines to avoid damage or voiding the warranty.
6.2 Storing the Meter and Test Strips
Proper storage of the True Metrix Meter and test strips is essential for maintaining functionality and accuracy. Store the meter in a cool, dry place, away from direct sunlight and moisture. Avoid extreme temperatures and physical damage. Test strips should remain in their original vial with the lid tightly sealed to prevent exposure to air, moisture, or light. Do not refrigerate test strips. Use strips only if they are within the expiration date and appear undamaged. Always ensure the vial is sealed after each use to maintain strip quality. Improper storage can lead to inaccurate readings or strip malfunction.
6.3 Replacing the Battery
To replace the battery in your True Metrix Meter, use a CR2032 lithium coin cell battery. Open the battery compartment on the back of the meter by sliding it downward. Remove the old battery and insert the new one, ensuring the positive (+) side faces upward. Close the compartment securely. After replacement, the meter will automatically turn on. You may need to reset the date and time. Dispose of the old battery safely, following local regulations. Use only the recommended battery type to ensure optimal performance and avoid damage to the device.
6.4 Troubleshooting Common Issues
If your True Metrix Meter is not functioning properly, check for common issues. If the meter does not turn on, ensure the battery is correctly inserted or replace it if necessary. For inaccurate readings, verify the test strip is properly aligned and not expired. If the display is blurry, clean it gently with a soft cloth. For error codes like “LO” or “HI,” ensure the sample size is adequate or the meter is calibrated correctly. Consult the user manual or contact customer support for unresolved issues. Always follow proper troubleshooting steps to maintain accuracy and performance.

Data Management
Effectively manage your glucose data with the True Metrix Meter. Track trends, store readings, and transfer data to compatible devices for better health monitoring and decision-making.
7.1 Viewing Test History
To view your test history on the True Metrix Meter, navigate to the “History” section via the menu. The meter stores up to 1,000 test results, including dates, times, and glucose levels. Each entry is timestamped and can be scrolled through using the navigation buttons. For added context, notes or tags (e.g., “Before Meal” or “After Exercise”) can be applied to specific readings. This feature helps users track trends and patterns over time, making it easier to share detailed records with healthcare providers. Regularly reviewing your history can also help identify areas for improvement in glucose management.
7.2 Downloading Data to a Computer
To download data from the True Metrix Meter to a computer, ensure the meter is connected using the provided USB cable or compatible adapter. Install the manufacturer-recommended software from the official website or the CD provided. Once installed, launch the software and follow the on-screen instructions to synchronize the meter with your computer. The software will guide you through selecting the data range and format for export. Ensure the data is saved in a secure location, using formats like CSV or Excel for easy analysis. For troubleshooting, refer to the user manual or contact customer support. Always prioritize data privacy by using secure software and storage solutions.
7.3 Syncing with Mobile Applications
To sync the True Metrix Meter with mobile applications, ensure the meter is paired with your smartphone via Bluetooth. Download and install the compatible app from the App Store or Google Play Store. Open the app and follow the pairing instructions, which may require entering a code or selecting the meter from the available devices list. Once connected, the app will automatically sync your blood glucose data, allowing you to track trends, set reminders, and share results with healthcare providers. Ensure your device has stable internet connectivity for seamless syncing and data management.
7.4 Using the Docking Station
The docking station provides a convenient way to charge the True Metrix Meter and transfer data to a computer. Connect the meter to the docking station using the provided USB cable. Ensure the docking station is properly aligned with the meter’s port. The docking station also allows for seamless data transfer to a computer via USB, enabling you to manage and analyze your blood glucose data. Place the docking station on a stable surface to avoid accidental disconnection. Refer to the manufacturer’s guidelines for optimal use and ensure the docking station is compatible with your computer’s operating system.

Safety Information
Always use the True Metrix Meter as directed to ensure safe and accurate results; Avoid exposing the device to extreme temperatures or moisture, which may damage it. Keep out of reach of children and avoid sharing the meter or test strips to prevent contamination. Follow all safety guidelines to prevent injury or inaccurate readings. Regularly inspect the device for damage and ensure proper handling to maintain its functionality and your safety.
8.1 Precautions for Use
Handle the True Metrix Meter and test strips with care to ensure accuracy and safety. Avoid touching the test strip pad to prevent contamination. Use the meter in a clean, dry environment. Do not expose the device to extreme temperatures, moisture, or direct sunlight. Handle the meter with dry hands to prevent electrical issues. Avoid dropping the device, as it may damage the internal components. Use only unexpired test strips from sealed containers. Never reuse test strips or share the meter. Store the device and strips in a cool, dry place. Keep out of reach of children. Follow all precautions to ensure reliable results.
8.2 Handling and Disposal of Biohazardous Materials
Dispose of used test strips, lancets, and other biohazardous materials safely; Use puncture-proof containers for sharps like lancets to prevent injury. Seal containers when full and label them as biohazardous waste. Dispose of these materials according to local regulations or healthcare facility guidelines. Clean spills with a 1:10 bleach solution. Wash hands thoroughly after handling biohazardous items. Never reuse or share lancets or test strips. Ensure proper disposal to prevent accidental exposure and environmental contamination. Always follow safety protocols to minimize risks associated with biohazardous waste.
8.3 Avoiding Common Errors
To ensure accurate results and safe use of the True Metrix Meter, avoid common errors. Always use unexpired test strips and handle them correctly to prevent contamination. Insert strips into the meter before obtaining a blood sample to avoid errors. Use the correct lancet depth to obtain adequate blood samples. Avoid touching the test strip tip or reusing strips. Calibrate the meter as instructed and clean it regularly. Do not ignore error messages; refer to the user manual for troubleshooting. Proper technique and adherence to guidelines minimize errors and ensure reliable glucose monitoring.

Regulatory and Compliance Information
The True Metrix Meter adheres to FDA clearance and international standards, ensuring safety and accuracy. It is designed to meet regulatory requirements for medical devices globally.
9.1 FDA Clearance and Compliance
The True Metrix Meter is FDA-cleared for safety and accuracy, meeting rigorous guidelines for blood glucose monitoring systems. It complies with 21 CFR Part 810 regulations, ensuring reliable performance for both professional and personal use. The device is manufactured under quality systems certified to ISO 13485, reflecting adherence to global medical device standards. FDA clearance confirms its ability to provide accurate blood glucose readings, essential for diabetes management. Regular compliance checks ensure the meter remains aligned with regulatory requirements, maintaining trust and reliability for users.
9.2 International Standards Compliance
The True Metrix Meter complies with international standards, ensuring its performance and safety meet global requirements. It is CE-marked, indicating conformity with EU directives for medical devices. The meter also adheres to ISO 13485:2016 standards for quality management systems in medical device manufacturing. Additionally, it meets the requirements of Health Canada and the Australian Therapeutic Goods Administration. Compliance with these standards ensures the device is reliable, accurate, and safe for use worldwide. This global certification underscores its suitability for diverse healthcare environments, maintaining high standards of quality and patient care across borders.
9.3 Manufacturer’s Warranty and Support
The True Metrix Meter is backed by a manufacturer’s warranty that covers defects in materials and workmanship for a specified period. Customers can contact the dedicated customer service team for support, including troubleshooting, repair, or replacement of defective devices. Additional resources, such as user manuals and FAQs, are available on the manufacturer’s website. Extended support options may also be offered, ensuring users receive assistance whenever needed. This comprehensive support system aims to enhance user experience and ensure optimal performance of the True Metrix Meter for accurate blood glucose monitoring.
The True Metrix Meter is an effective and user-friendly device for blood glucose monitoring. This manual provides a comprehensive guide to setup, testing, and maintenance, ensuring accurate results and optimal use. By following the instructions and tips outlined, users can manage their diabetes confidently and effectively. Refer to the manual regularly for troubleshooting and best practices to maximize the meter’s performance and longevity.
10.1 Summary of Key Points
The True Metrix Meter is a precise and reliable tool for blood glucose monitoring. Proper setup, including battery insertion and date/time configuration, ensures accurate results. Regular cleaning, correct test strip handling, and control solution use maintain performance. Understanding target ranges and alarms helps in effective glucose management. Data management features allow easy tracking of results. Always follow safety guidelines and troubleshooting tips for optimal use. By adhering to the manual’s instructions, users can confidently manage their diabetes and ensure the meter’s longevity and accuracy.
10.2 Final Tips for Effective Use
Consistently follow the manual’s guidelines for accurate results. Regularly clean and maintain the meter to prevent errors. Store test strips properly to ensure their effectiveness. Use control solutions to verify meter accuracy. Keep the device away from extreme temperatures and moisture. Replace the battery promptly when needed. Familiarize yourself with the alarm system for timely interventions. Explore data management features to track progress. Always dispose of biohazardous materials safely. By adhering to these tips, you can maximize the True Metrix Meter’s performance and ensure reliable blood glucose monitoring for better diabetes management.