
Metal Roofing Installation Guide: A Comprehensive Plan
Navigating a DIY metal roof installation demands careful planning, proper tools, and a solid understanding of techniques; a detailed PDF guide is essential for success.
Metal roofing represents a significant investment in your home, offering exceptional durability, longevity, and aesthetic appeal. A comprehensive metal roofing installation guide, often available as a PDF, is crucial for both seasoned DIYers and those new to roofing projects. These guides detail everything from material selection – standing seam, shingles, or corrugated metal – to the intricacies of proper fastening and sealing techniques.
Understanding the benefits, such as energy efficiency and increased property value, is the first step. However, successful installation hinges on meticulous preparation, adherence to safety protocols, and a thorough grasp of the specific metal roofing system chosen. A well-structured PDF guide will walk you through each stage, ensuring a watertight and long-lasting roof. Ignoring proper procedures can lead to costly repairs and compromised structural integrity, making a detailed resource invaluable.
Types of Metal Roofing Materials
Metal roofing isn’t a one-size-fits-all solution; various materials cater to different aesthetic preferences and budgetary constraints. A detailed metal roofing installation guide PDF will thoroughly explore these options. Standing seam metal roofing, known for its clean lines and concealed fasteners, offers superior weather resistance. Metal shingles, shakes, and tiles mimic traditional roofing materials while providing metal’s inherent benefits – durability and fire resistance.
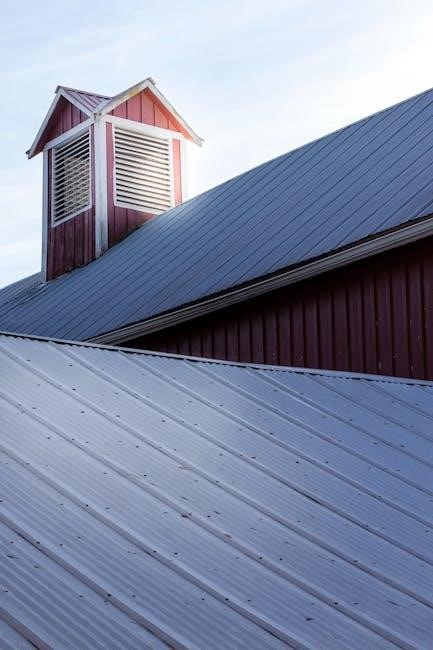
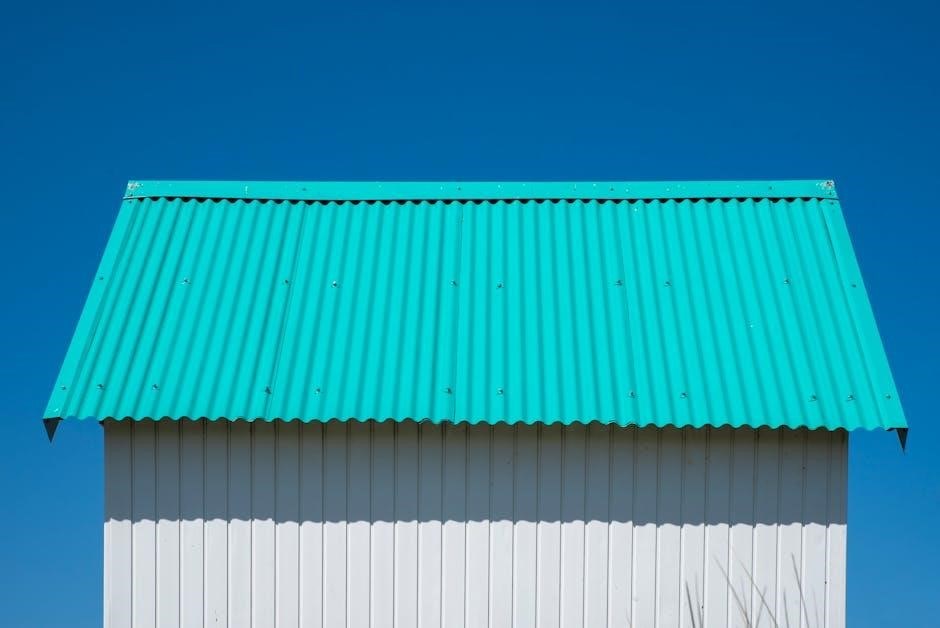
Corrugated metal roofing, a cost-effective choice, is often used for agricultural or industrial buildings but is gaining popularity in residential applications. The PDF guide will outline the specific installation techniques for each material, including appropriate fasteners (stitch screws, tek screws) and flashing details. Understanding the pros and cons of each type, as detailed in the guide, is vital for making an informed decision aligned with your project’s needs and local climate.
Standing Seam Metal Roofing
Standing seam metal roofing represents a premium choice, characterized by its vertically oriented panels with raised seams. A comprehensive metal roofing installation guide PDF will detail the precise methods for achieving a watertight and aesthetically pleasing result. Crucially, vertical laps require stitch screws, typically installed every 12 inches after pre-drilling with a 1/8-inch bit on the left side only when sheeting from left to right.
The PDF will emphasize the importance of butyl tape for sealing these vertical laps, ensuring long-term weather protection. Proper panel alignment and consistent fastener spacing are paramount. Ridge cap installation demands securing to every high rib with stitch screws, again utilizing butyl tape on horizontal ridge seams. The guide will illustrate these steps, providing clarity for both novice and experienced installers, maximizing the lifespan and performance of your standing seam roof.
Metal Shingles, Shakes, and Tiles
Metal shingles, shakes, and tiles offer the aesthetic appeal of traditional roofing materials with the durability of metal. A detailed metal roofing installation guide PDF is vital for successful implementation, outlining specific fastening techniques. Tek 3 screws with washers are recommended for securing panels to purlins – three per purlin for each sheet, increasing to six for top and bottom edges, and two panels in from the rake.
The PDF will illustrate proper overlap and alignment, crucial for weather resistance. It will also cover considerations for underlayment and flashing around chimneys and valleys. Rivets are often preferred for rake edge installation, offering a clean finish. Remember to slightly loosen bottom screws to facilitate water drainage into gutters. The guide will emphasize safety, including the mandatory use of a harness and retractable lifeline with purlin clips.
Corrugated Metal Roofing
Corrugated metal roofing, a cost-effective and lightweight option, requires a precise installation process detailed in a comprehensive PDF guide. Stitch screws are essential for secure vertical laps, pre-drilling with a 1/8-inch bit on the left side only when sheeting from left to right. The guide will specify a 12-inch spacing for these screws. Tek 3 screws with washers are crucial for attaching sheets to mid-purlins, utilizing three screws per sheet.
Increased fastening – six screws – is needed at top and bottom edges, and two panels from the rake. The PDF will illustrate proper panel overlap and the use of butyl tape for sealing vertical laps and horizontal ridge seams. Secure the ridge cap to every high rib with stitch screws, applying butyl tape underneath. A detailed diagram will show proper flashing techniques for eaves and rakes, ensuring watertight protection.
Tools and Materials Checklist
A detailed metal roofing installation PDF guide emphasizes a comprehensive checklist. Essential tools include a metal shear, drill with various bits (1/8-inch for stitch screws), screw gun, measuring tape, chalk line, and safety glasses. Materials encompass corrugated metal panels, underlayment (waterproofing membrane), stitch screws, Tek 3 screws with washers, butyl tape, flashing (eave, rake, valley, chimney), and potentially OSB3 for decking repair.
The PDF will specify quantities based on roof size. Don’t forget rivet guns for rake edge installation, contact adhesive for EPDM rubber application, and flexible silicone for sealing. Fall protection – harness and purlin clips – are non-negotiable; A complete list ensures a smooth process, minimizing delays and guaranteeing a professional, watertight result, as outlined in the guide.
Safety Precautions for Metal Roofing Installation
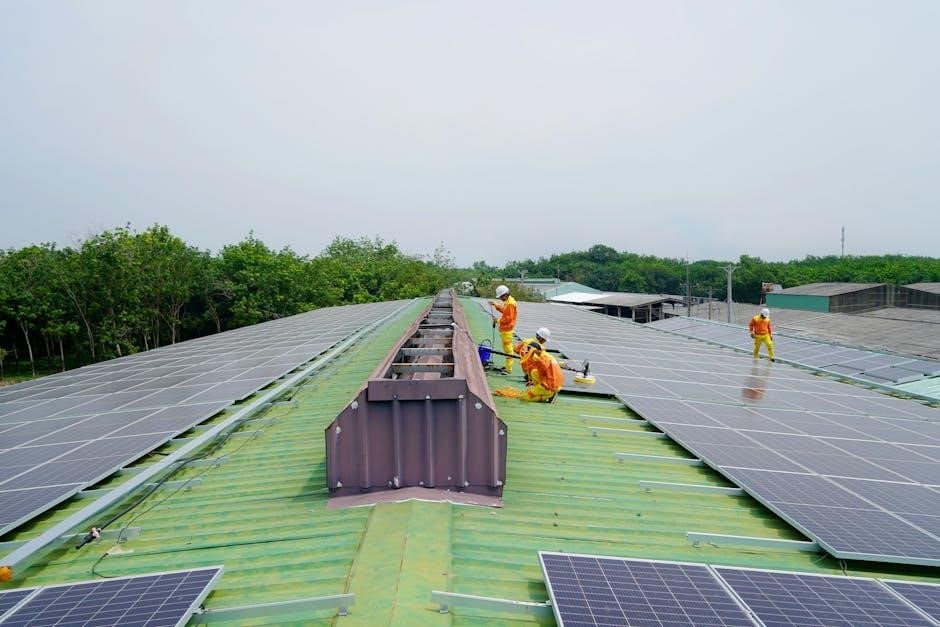
A comprehensive metal roofing installation PDF guide prioritizes safety above all else. The guide stresses the absolute necessity of Personal Protective Equipment (PPE), including safety glasses, work gloves, and sturdy, non-slip footwear. Crucially, a fall protection system is paramount; a full-body harness with a retractable lifeline and butterfly purlin clips (secured with Tek screws) is non-negotiable.
Working at height presents inherent risks, and the PDF will detail proper anchor point selection and lifeline usage. Be mindful of weather conditions – avoid installation during high winds or inclement weather. Securely fasten tools to prevent drops. Always maintain a safe work zone, and never work alone. Adhering to these precautions, detailed in the PDF, minimizes the risk of accidents.
Personal Protective Equipment (PPE)
The metal roofing installation PDF guide emphatically details required Personal Protective Equipment (PPE). Safety glasses are crucial, protecting eyes from flying debris during cutting and fastening. Durable work gloves safeguard hands from sharp metal edges and potential cuts. Sturdy, non-slip work boots provide essential footing on sloped roofs, minimizing slip and fall risks.
Furthermore, the guide recommends long sleeves and pants for skin protection. A hard hat is vital, especially when working beneath existing roofing materials. Consider a dust mask, particularly when cutting or grinding metal. Proper PPE, as outlined in the PDF, isn’t merely recommended—it’s a fundamental requirement for a safe and successful installation.
Fall Protection Systems
A comprehensive metal roofing installation PDF guide prioritizes fall protection. Harnesses and retractable lifelines are non-negotiable when working at heights, securing roofers to a stable anchor point. Purlin clips, installed with Tek screws, provide convenient and reliable anchor points along the roof structure, as detailed within the guide.
The PDF stresses the importance of proper harness fitting and regular inspection of all fall protection equipment. It also highlights the necessity of establishing a safe work zone below, free from obstructions. Never work alone; a buddy system ensures immediate assistance in case of an emergency. Adhering to the fall protection protocols outlined in the PDF is paramount for preventing serious injuries.
Roof Preparation
A detailed metal roofing installation PDF guide emphasizes thorough roof preparation. Begin with a meticulous inspection of the existing roof deck, identifying any areas of rot, weakness, or damage. If decking is wet, the PDF recommends applying OSB3 – 11mm for overboarding or 18mm for complete renewal – to create a solid, stable base.
The guide outlines the complete removal of existing roofing materials, ensuring a clean surface for the new metal roof. Crucially, it details the installation of underlayment, a vital waterproofing membrane. Overlapping underlayment by at least 6 inches is recommended, providing an extra layer of protection against water intrusion, particularly important in regions with heavy rainfall like the UK.
Inspecting the Existing Roof Deck
A comprehensive metal roofing installation PDF guide prioritizes a detailed inspection of the roof deck. This involves a systematic search for signs of rot, water damage, or structural weakness. The guide stresses the importance of probing the wood with a screwdriver to identify soft spots, indicating potential decay. Any compromised sections must be replaced before proceeding.
The PDF highlights the need to check for sagging or unevenness, which could affect the metal roof’s performance. It also advises verifying the deck’s ability to support the added weight of the metal roofing system. Addressing these issues early prevents future problems and ensures a secure, long-lasting installation, as detailed within the guide’s instructions.
Removing Existing Roofing Materials
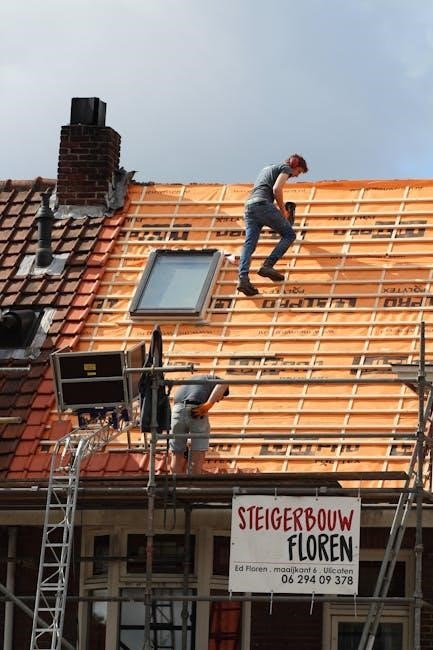
The metal roofing installation PDF guide meticulously details the safe and efficient removal of existing roofing materials. It emphasizes adhering to local regulations regarding disposal of old roofing, often involving specific landfill requirements. The guide stresses the importance of stripping the roof down to the bare deck, removing all traces of old shingles, felt paper, and fasteners.
It cautions against damaging the underlying deck during removal and advises careful handling of materials to avoid injury. The PDF also highlights the need for proper personal protective equipment (PPE) during this phase. A thorough cleaning of the deck follows removal, ensuring a smooth and secure surface for the new metal roofing system, as illustrated within the guide’s step-by-step instructions.
Installing Underlayment (Waterproofing Membrane)
The comprehensive metal roofing installation PDF guide dedicates significant attention to underlayment installation, emphasizing its crucial role in waterproofing. It details various underlayment options, including synthetic materials and modified bitumen, outlining their respective benefits and applications. The guide stresses the importance of overlapping seams correctly, typically by a minimum of six inches, to prevent water intrusion.
It provides clear diagrams illustrating proper fastening techniques, recommending specific nail or staple patterns for different underlayment types. The PDF also addresses dealing with wet decking, suggesting OSB3 application for enhanced moisture resistance. Proper underlayment installation, as detailed in the guide, forms a vital barrier against leaks and extends the lifespan of the metal roof.
Metal Roofing Installation Process ⎻ Step-by-Step
A detailed metal roofing installation PDF guide breaks down the process into manageable steps, beginning with installing starter courses to secure the initial panels. It meticulously explains panel installation techniques, emphasizing vertical laps and proper fastener placement. The guide highlights the use of stitch screws for these laps, recommending pre-drilling with a 1/8-inch bit on the left side only, working from left to right.
Furthermore, it specifies Tek 3 screws with washers for purlin attachment – three per sheet for mid-purlins, six for top and bottom, and two panels from rake edges. The PDF stresses securing the ridge cap to every high rib with stitch screws and utilizing butyl tape for horizontal ridge seams, ensuring a watertight seal.
Installing Starter Courses
A comprehensive metal roofing installation PDF guide emphasizes the critical role of starter courses in establishing a secure foundation. These initial panels must be meticulously installed to prevent future issues like leaks or panel slippage. The guide details proper alignment, ensuring a straight and even starting point for subsequent panels.
It specifies using appropriate fasteners – often Tek screws – to firmly attach the starter course to the roof deck. The PDF highlights the importance of overlapping starter course panels correctly, typically by a few inches, and sealing the seams with butyl tape for enhanced waterproofing. Proper starter course installation is foundational for a durable, long-lasting metal roof.
Panel Installation Techniques (Vertical Laps & Fasteners)
A detailed metal roofing installation PDF guide stresses the importance of correct vertical lap techniques for weather tightness. It explains pre-drilling with a 1/8-inch bit on the left side only, when using stitch screws for these laps, spaced approximately every 12 inches. The guide clarifies the necessity of using Tek 3 screws with washers for securing panels to purlins, recommending three per purlin for each sheet.
Furthermore, the PDF specifies six fasteners for top and bottom edges, and two panels in from the rake edges. Proper fastener selection and spacing are crucial. The guide emphasizes consistent application to avoid panel distortion and ensure a secure, long-lasting roof system, detailing the correct screw patterns for optimal performance.
Using Stitch Screws and Tek Screws
A comprehensive metal roofing installation PDF guide highlights the distinct applications of stitch and Tek screws. Stitch screws are specifically recommended for securing vertical laps, ensuring a watertight seal when paired with butyl tape. The guide details pre-drilling – a 1/8-inch bit on the left side only, working from left to right – to prevent panel distortion during installation.
Tek 3 screws, accompanied by washers, are designated for attaching panels to purlins. The PDF specifies three screws per purlin per sheet, increasing to six for top and bottom edges, and two panels inward from the rake. Correct torque settings are crucial; over-tightening can damage the panels, while under-tightening compromises security. The guide emphasizes proper screw selection based on substrate material.
Flashing and Sealing
A detailed metal roofing installation PDF guide stresses the critical role of flashing and sealing in preventing leaks. Ridge cap installation requires securing to every high rib with stitch screws, coupled with horizontal butyl tape seams for a robust, waterproof barrier. Eave and rake edge flashing are essential, with options including rivets or plug-and-seal methods using flexible silicone, adapting to local building practices.
Valley and chimney flashing demand precise fitting and sealing. The guide illustrates techniques for integrating flashing into mortar joints or directly screwing to the wall. Butyl tape is vital for sealing vertical laps, ensuring a watertight connection between panels. Proper flashing prevents water intrusion and extends the roof’s lifespan, as detailed within the PDF.

Ridge Cap Installation & Sealing with Butyl Tape
A comprehensive metal roofing installation PDF guide emphasizes securing the ridge cap to every high rib utilizing stitch screws, guaranteeing a firm mechanical connection. Crucially, the guide details applying butyl tape to horizontal ridge seams – both above and below – to create a fully sealed, waterproof barrier. This dual-layer approach prevents water penetration even under extreme weather conditions.
The PDF illustrates proper overlap techniques and screw placement for optimal performance. It also highlights the importance of using high-quality butyl tape specifically designed for metal roofing applications. Correct installation, as shown in the guide, ensures long-term durability and prevents costly repairs, making it a vital step in the overall roofing process.
Eave and Rake Edge Flashing
A detailed metal roofing installation PDF guide stresses the importance of extending flashing at least 6 inches up the wall to accommodate potential wind-driven rain. The guide showcases two common UK methods: utilizing metal over flashing secured into a racked-out mortar joint and screwing it to the wall, or alternatively, plugging and sealing with flexible silicone.
For rake edges, the PDF recommends rivet installation as a preferred method, offering a clean and secure finish. It also advises slightly loosening bottom screws to facilitate proper water drainage into the gutter system. Proper flashing prevents water damage to fascia boards and underlying structures, ensuring the longevity of the roof. The guide provides clear diagrams and step-by-step instructions for both techniques.
Valley Flashing and Chimney Flashing
A comprehensive metal roofing installation PDF guide emphasizes meticulous detailing around valleys and chimneys to prevent leaks. For valleys, the guide illustrates proper overlapping techniques and the crucial use of butyl tape to create a watertight seal between flashing pieces. It details how to ensure the flashing extends sufficiently up the slope on both sides of the valley.
Chimney flashing requires careful attention to accommodate expansion and contraction. The PDF recommends a stepped flashing approach, weaving the flashing into the chimney’s mortar joints and sealing with high-quality sealant. It stresses the importance of counter flashing to protect the flashing’s upper edge. Diagrams within the guide clearly demonstrate proper installation sequences for both valley and chimney flashing, ensuring a durable and leak-proof roof.
Addressing Specific Installation Challenges
A detailed metal roofing installation PDF guide acknowledges common hurdles and provides solutions. Dealing with wet decking necessitates applying OSB3, either as an overlay (11mm) or complete replacement (18mm), ensuring a solid, dry base. The guide stresses using contact adhesive for secure bonding across multiple surfaces, allowing for tack drying before proceeding.
For warm roof construction, the PDF highlights the critical inclusion of a vapor barrier before insulation installation, preventing condensation buildup. It also addresses under cladding overlap, recommending at least 6 inches to deflect driven rain. UK practices, detailed in some guides, involve metal over flashing secured into mortar joints or sealed with flexible silicone. These specific challenges are thoroughly illustrated within the PDF for confident execution.
Dealing with Wet Decking & OSB3 Application
A comprehensive metal roofing installation PDF guide prioritizes addressing wet decking immediately. If the existing deck is damp, applying OSB3 is crucial for a stable, long-lasting roof. The guide recommends using 11mm OSB3 as an overlay if possible, or 18mm for a complete deck renewal, ensuring sufficient structural integrity.
The PDF emphasizes utilizing contact adhesive for optimal bonding, allowing a “tack dry” period before proceeding. This ensures a strong, reliable connection between the OSB3 and the existing structure. Detailed diagrams illustrate proper OSB3 panel orientation and fastening techniques. The guide also cautions against installing metal roofing directly onto wet wood, stressing the importance of a dry substrate to prevent future issues like rot and corrosion.
Warm Roof Construction & Vapor Barriers
A detailed metal roofing installation PDF guide highlights the critical role of vapor barriers in warm roof construction. When insulation is installed under the plywood decking, a vapor barrier becomes essential to prevent moisture buildup within the roof assembly, mitigating potential structural damage and mold growth.
The guide provides clear illustrations demonstrating proper vapor barrier placement – before insulation installation. It details acceptable vapor barrier materials and their respective installation methods, including overlapping requirements and sealing techniques. Furthermore, the PDF stresses the importance of airtightness, advising careful attention to penetrations and seams. Proper ventilation is also addressed, ensuring a balanced system for optimal performance and longevity of the warm roof.
Metal Roofing Fastener Guide
A comprehensive metal roofing installation PDF guide dedicates significant attention to fastener selection and application. It details the specific uses of stitch screws for vertical laps, recommending pre-drilling with a 1/8-inch bit on the left side only when sheeting from left to right, spaced every 12 inches.
The guide further specifies Tek 3 screws with washers for securing panels to purlins – three per sheet for mid-purlins, six for top and bottom, and two panels in from the rake edges. It emphasizes the importance of butyl tape for sealing vertical laps and utilizing inside/outside closures for enhanced weather protection. Proper ridge cap fastening, using stitch screws into every high rib with doubled butyl tape on horizontal seams, is also covered.
Metal Roofing Closure Systems
A detailed metal roofing installation PDF guide highlights crucial closure systems for a watertight and durable roof. It emphasizes securing the ridge cap to every high rib using stitch screws, coupled with doubled butyl tape along horizontal ridge seams for superior sealing. Rake edge installation, potentially utilizing rivets, is also addressed.
The guide stresses loosening bottom screws to facilitate drip/gutter functionality, preventing water buildup. Furthermore, it details the importance of inside closures at the bottom of panels and outside closures beneath the ridge cap. UK practices, as outlined in some guides, involve metal over flashing integrated into mortar joints or sealed with flexible silicone, offering alternative approaches to weatherproofing.